![1512632091642-p-500.png]](https://help.consignorconnect.com/hs-fs/hubfs/1512632091642-p-500.png?width=131&height=50&name=1512632091642-p-500.png)
Draw each location’s booths, shelves and cases, rent booths to vendors, put items in spots, find any item on the map and see which spots sell.
Add spots to the map (Rose)
- Open Menu → Floor Map and pick the LOCATION (active locations first).
- Press + SPOT, then click where it goes on the map.
- Type the SPOT NAME / NUMBER (like B-12), pick the SPOT TYPE (BOOTH, SHELF, CASE, RACK, WALL or BIN) and an AREA / AISLE if you like, then save.
- Press MOVE / RESIZE to drag spots or their corners; press it again when done.
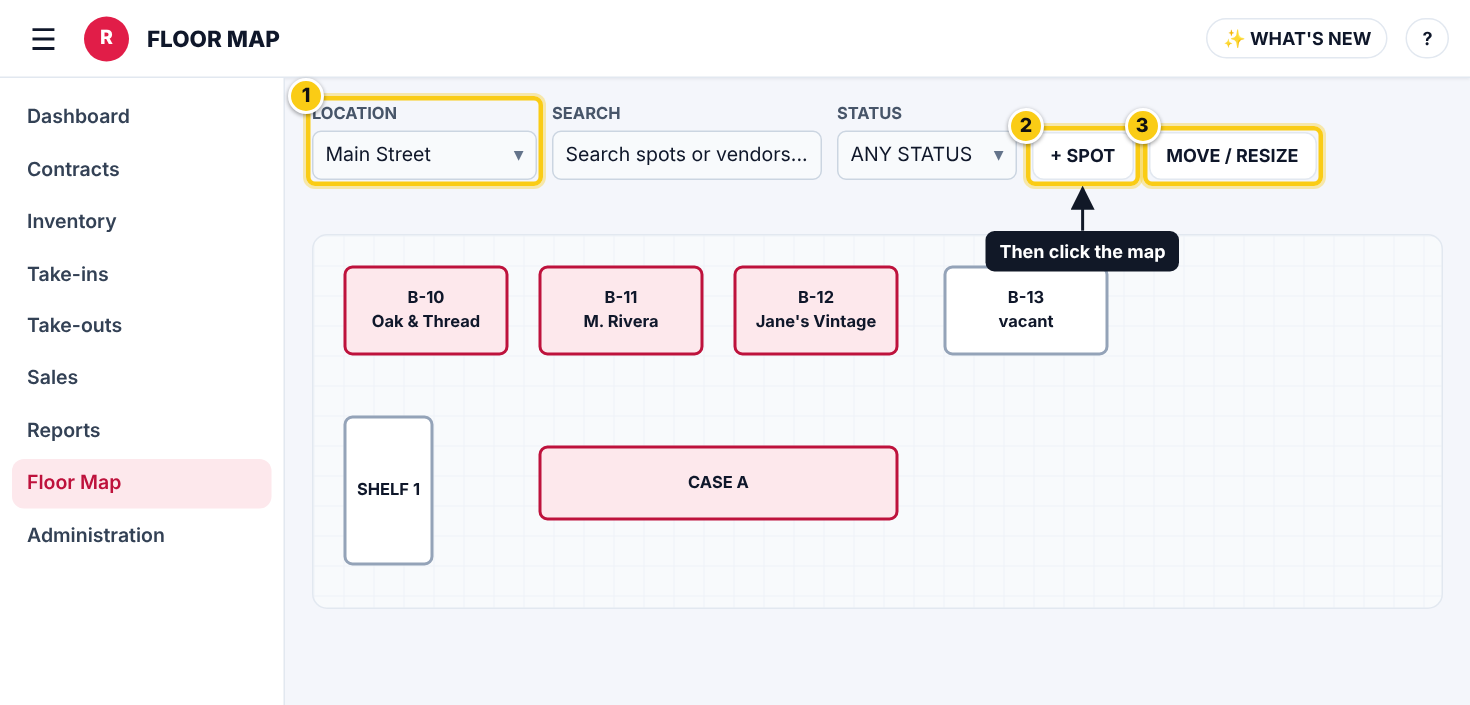
(1) the location, (2) + SPOT, (3) MOVE / RESIZE. Red = rented, white = vacant.
Rent a booth to a vendor (Rose)
- Click the spot to open it.
- Type the VENDOR ACCOUNT # (the name fills in) to make it OCCUPIED.
- Optional: set BOOTH RENT - the fee, FREQUENCY and FIRST CHARGE date. It is charged to the vendor as a Contracts - BILLING charge (0 = no rent).
- Save. MAKE VACANT frees the spot.
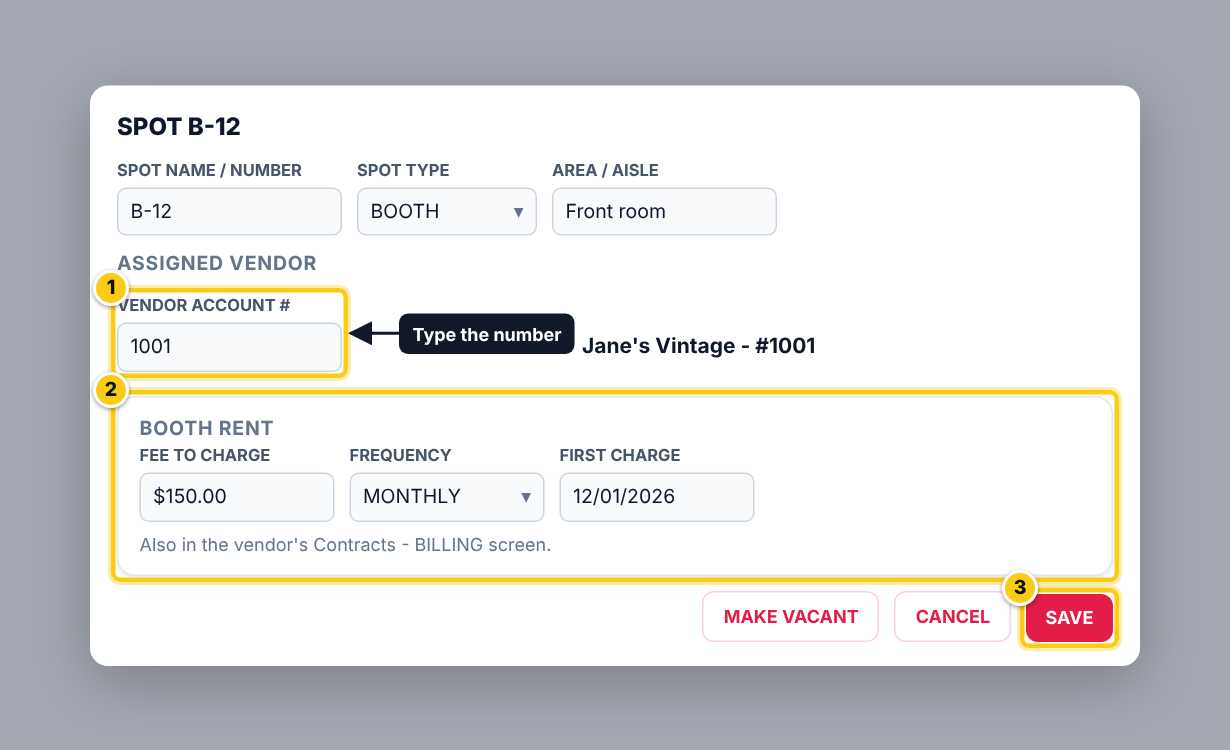
(1) the vendor’s account number, (2) booth rent, (3) save.
| Field | What it means |
|---|---|
| SPOT NAME / NUMBER | What staff and vendors call the spot. Prints on labels with the SPOT / BOOTH piece. |
| SPOT TYPE | BOOTH, SHELF, CASE, RACK, WALL or BIN. |
| VENDOR ACCOUNT # | The contract renting the spot. Their new items start in this spot. |
| BOOTH RENT | A recurring charge on the vendor’s account. It can also be changed in the vendor’s Contracts - BILLING screen. |
| FREQUENCY | How often the rent is charged. |
| FIRST CHARGE | The date of the first rent charge. |
Put items in spots (Rose)
- On Inventory, Contract inventory and Take-ins, items get a SPOT field (when the location has spots). A vendor’s new item starts in their own booth.
- In a spot’s window, ITEMS IN THIS SPOT lists what is there. Tick items and use MOVE ITEMS TO ANOTHER SPOT, or PRINT SPOT LIST for a checklist.
- Add the SPOT / BOOTH piece in the LABEL DESIGNER to print the spot on tags.
Find an item and see what sells (Rose)
- Type a SKU, scan a label or type a description in FIND ITEM and press FIND. The spots it is in light up.
- Change SHOW to SALES LAST 30 DAYS (greener = sold more) or SLOW MOVERS (60+ DAYS) (redder = more items sitting 60+ days).
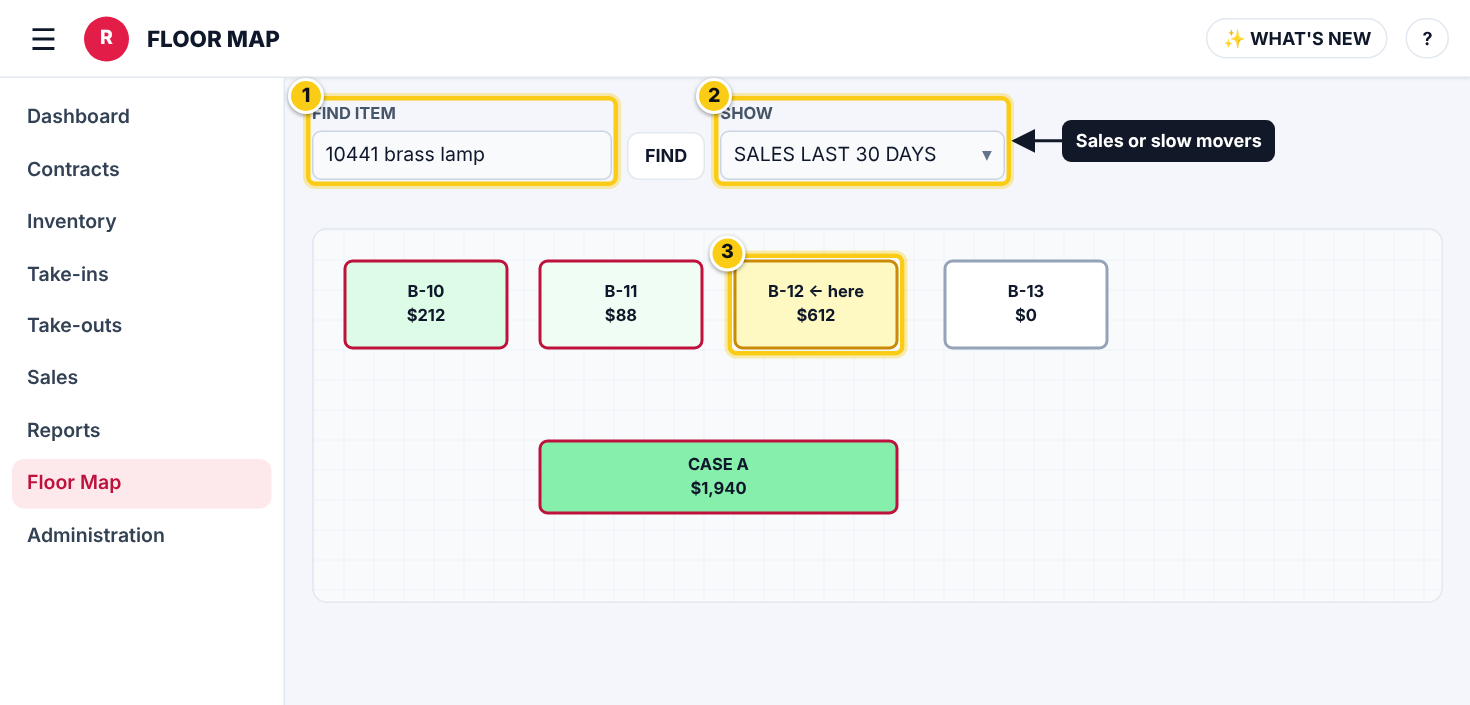
(1) FIND ITEM, (2) SHOW sales or slow movers, (3) the spot lights up.
Your booth in myPortal (myPortal)
- Sign in to myPortal. YOUR BOOTH shows a card for each location where you have a spot.
- Each spot shows its items for sale, sales in the last 30 days and items that have been there 60+ days.
- Your items list has a SPOT column, so you know where each one is.
Who can do this (user rights)
| Right in User Maintenance | What it allows | Who has it at first |
|---|---|---|
| Locations/Discounts | Opens Menu → Floor Map. | Users with Locations/Discounts ticked |
Questions
Can each location have its own map?
Yes. Pick the location at the top; each has its own spots.
What happens to items when I move a spot to another location?
They are taken out of the spot, since they are still at the old location.
Why don't I see YOUR BOOTH?
Your store hasn’t assigned you a spot yet. Ask them to add you on their Floor Map.
Still stuck? Ask Rosebot (the bubble at the bottom right of Rose and myPortal) or contact Consignor Connect support.