![1512632091642-p-500.png]](https://help.consignorconnect.com/hs-fs/hubfs/1512632091642-p-500.png?width=131&height=50&name=1512632091642-p-500.png)
Still on Classic Rose? See the Classic Rose steps.
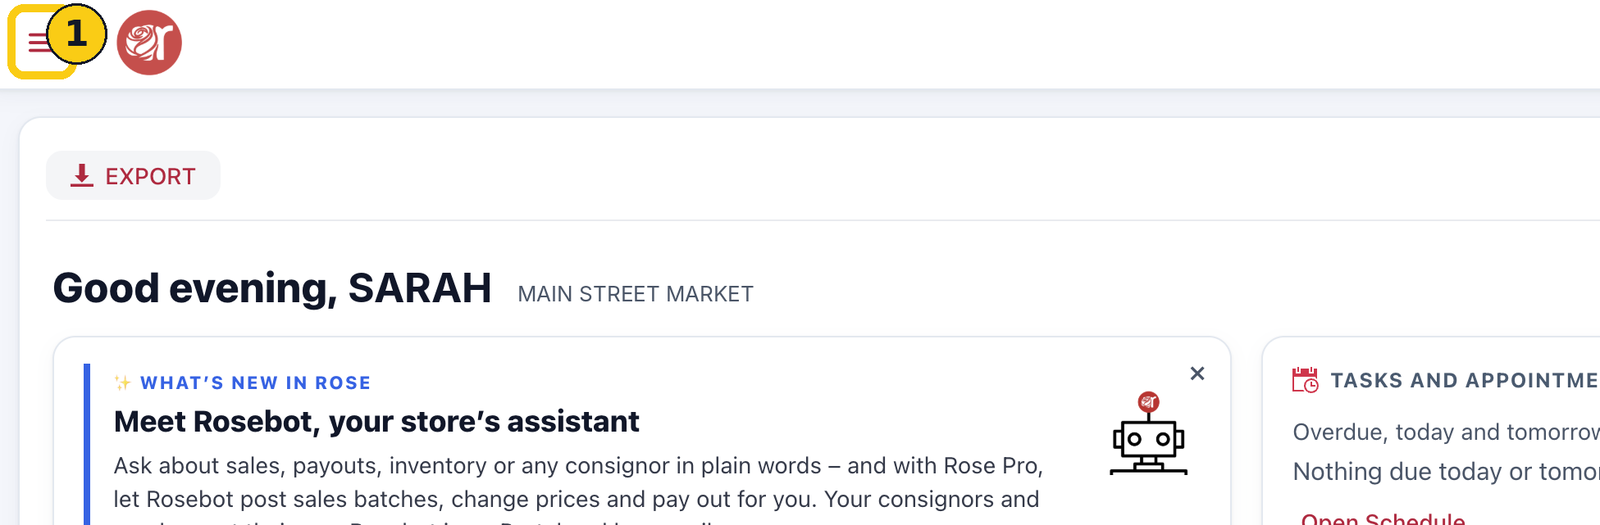
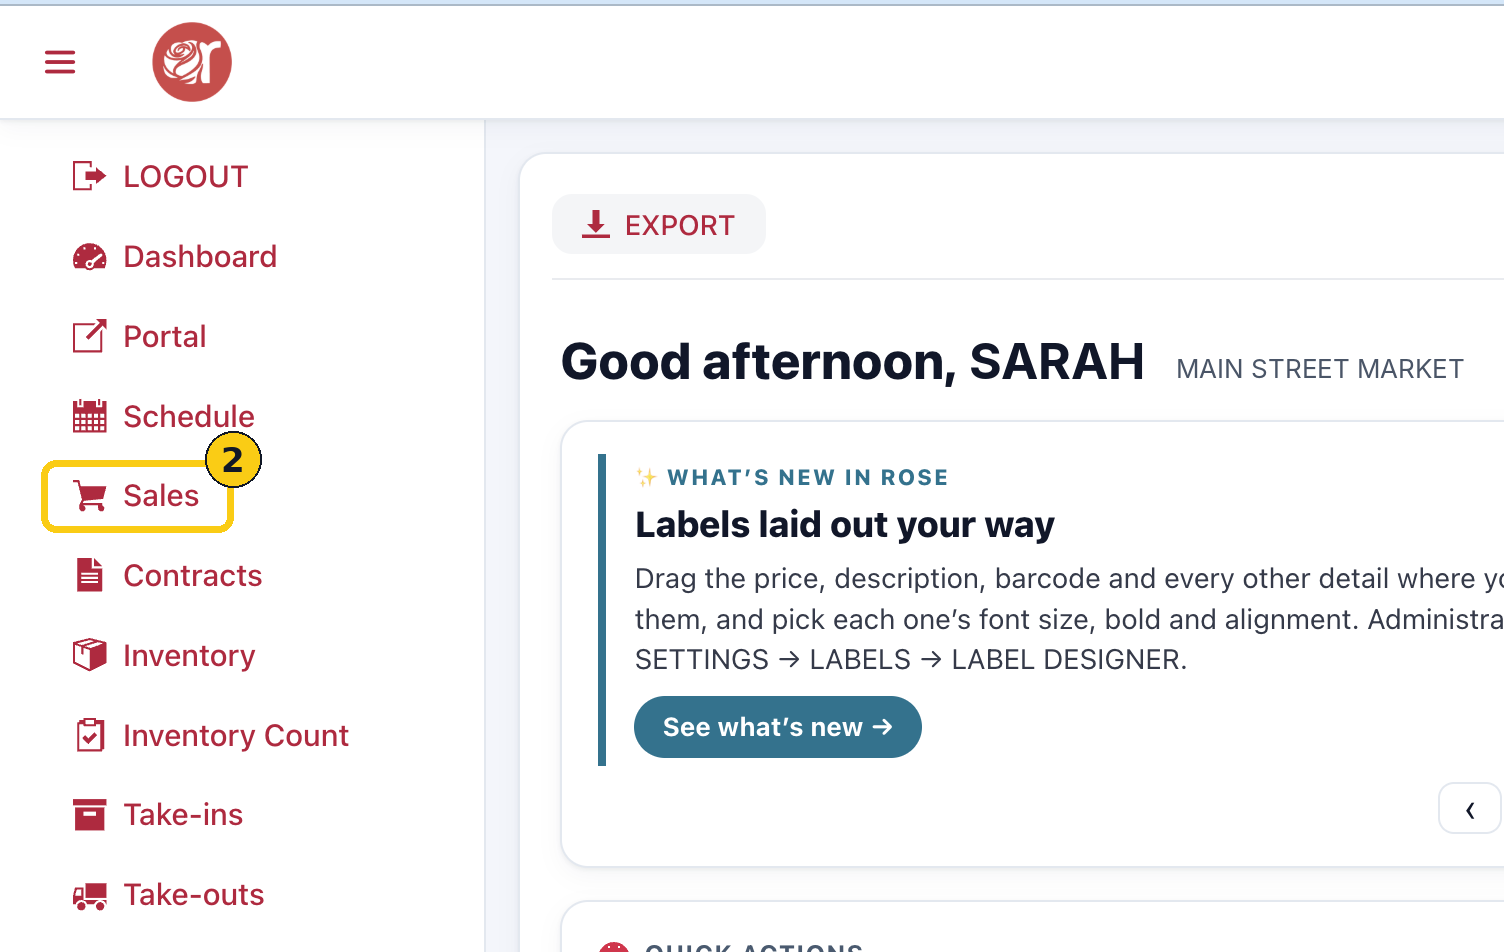
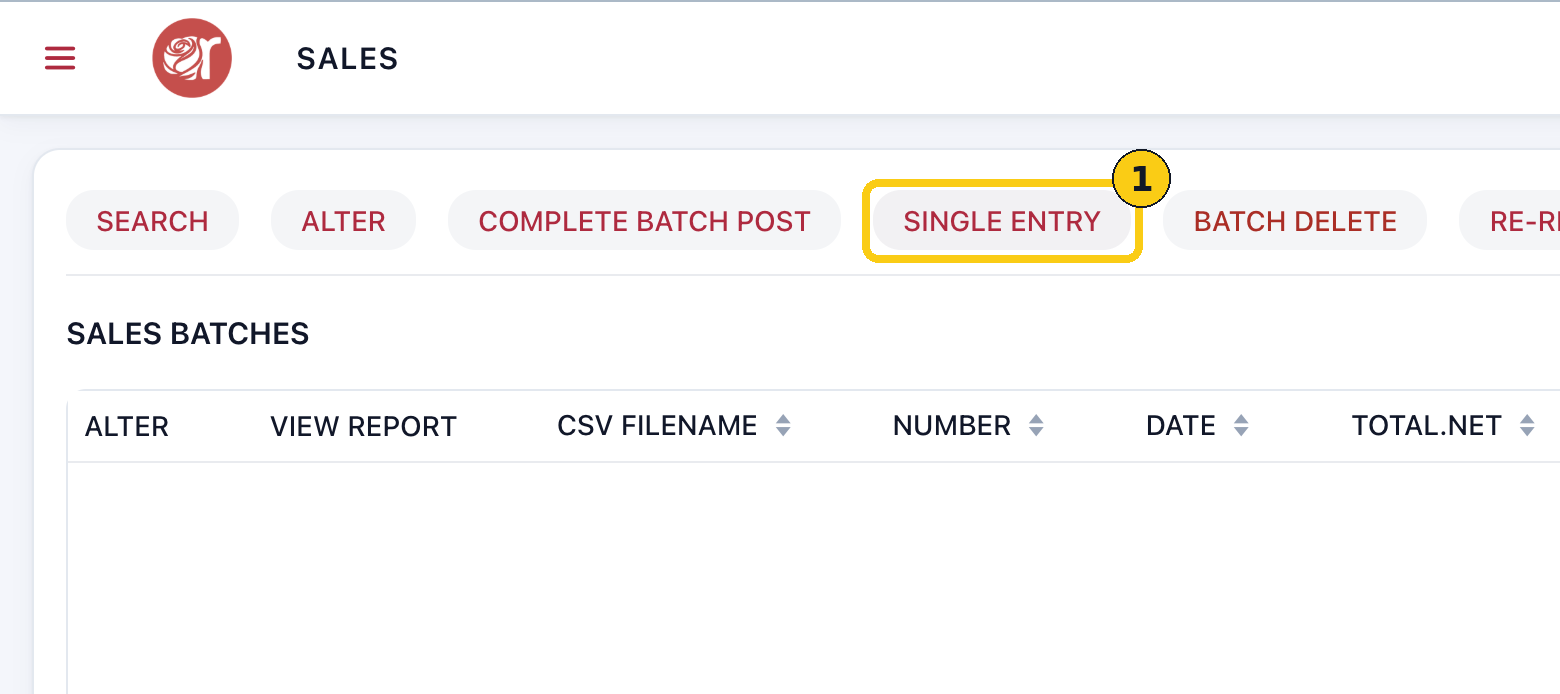
In each screenshot, the yellow boxes show what to click. Numbers give the order.
Overview
Single Entry posts a sale straight to a consignor's or vendor's account, one item at a time. Use it for a sale made outside Square (a cash sale at an event, say), to record a Square sale Rose didn't pick up, or to fix a mistake. The consignor's share is added to what they're owed, just like a Square sale.
Where to find it: Dashboard › menu (☰) › Sales › SINGLE ENTRY. You need the Sales module and its single entry right (User Maintenance).
Step 1: Open Single Entry
1. On your Dashboard, click the menu icon (☰) in the top-left corner.
2. Click Sales. The SALES BATCHES list opens.
3. Click SINGLE ENTRY in the toolbar.
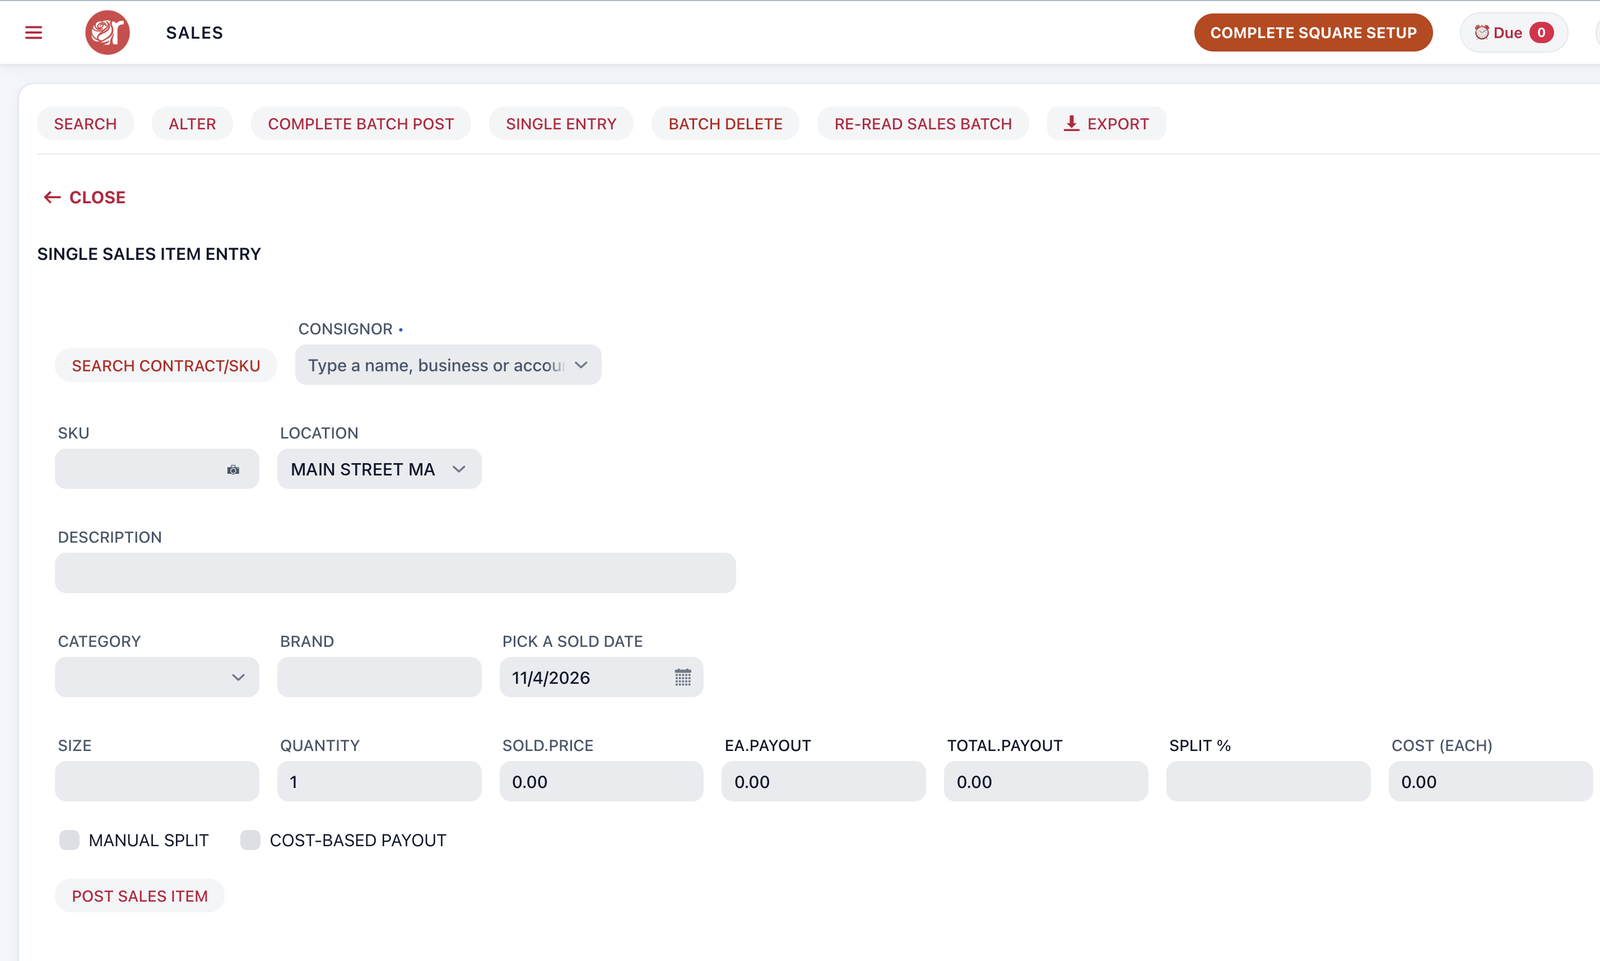
SINGLE SALES ITEM ENTRY opens. Click CLOSE at any time to go back to the Sales list without posting.
Step 2: Enter the SKU or choose the consignor
If the item has a SKU
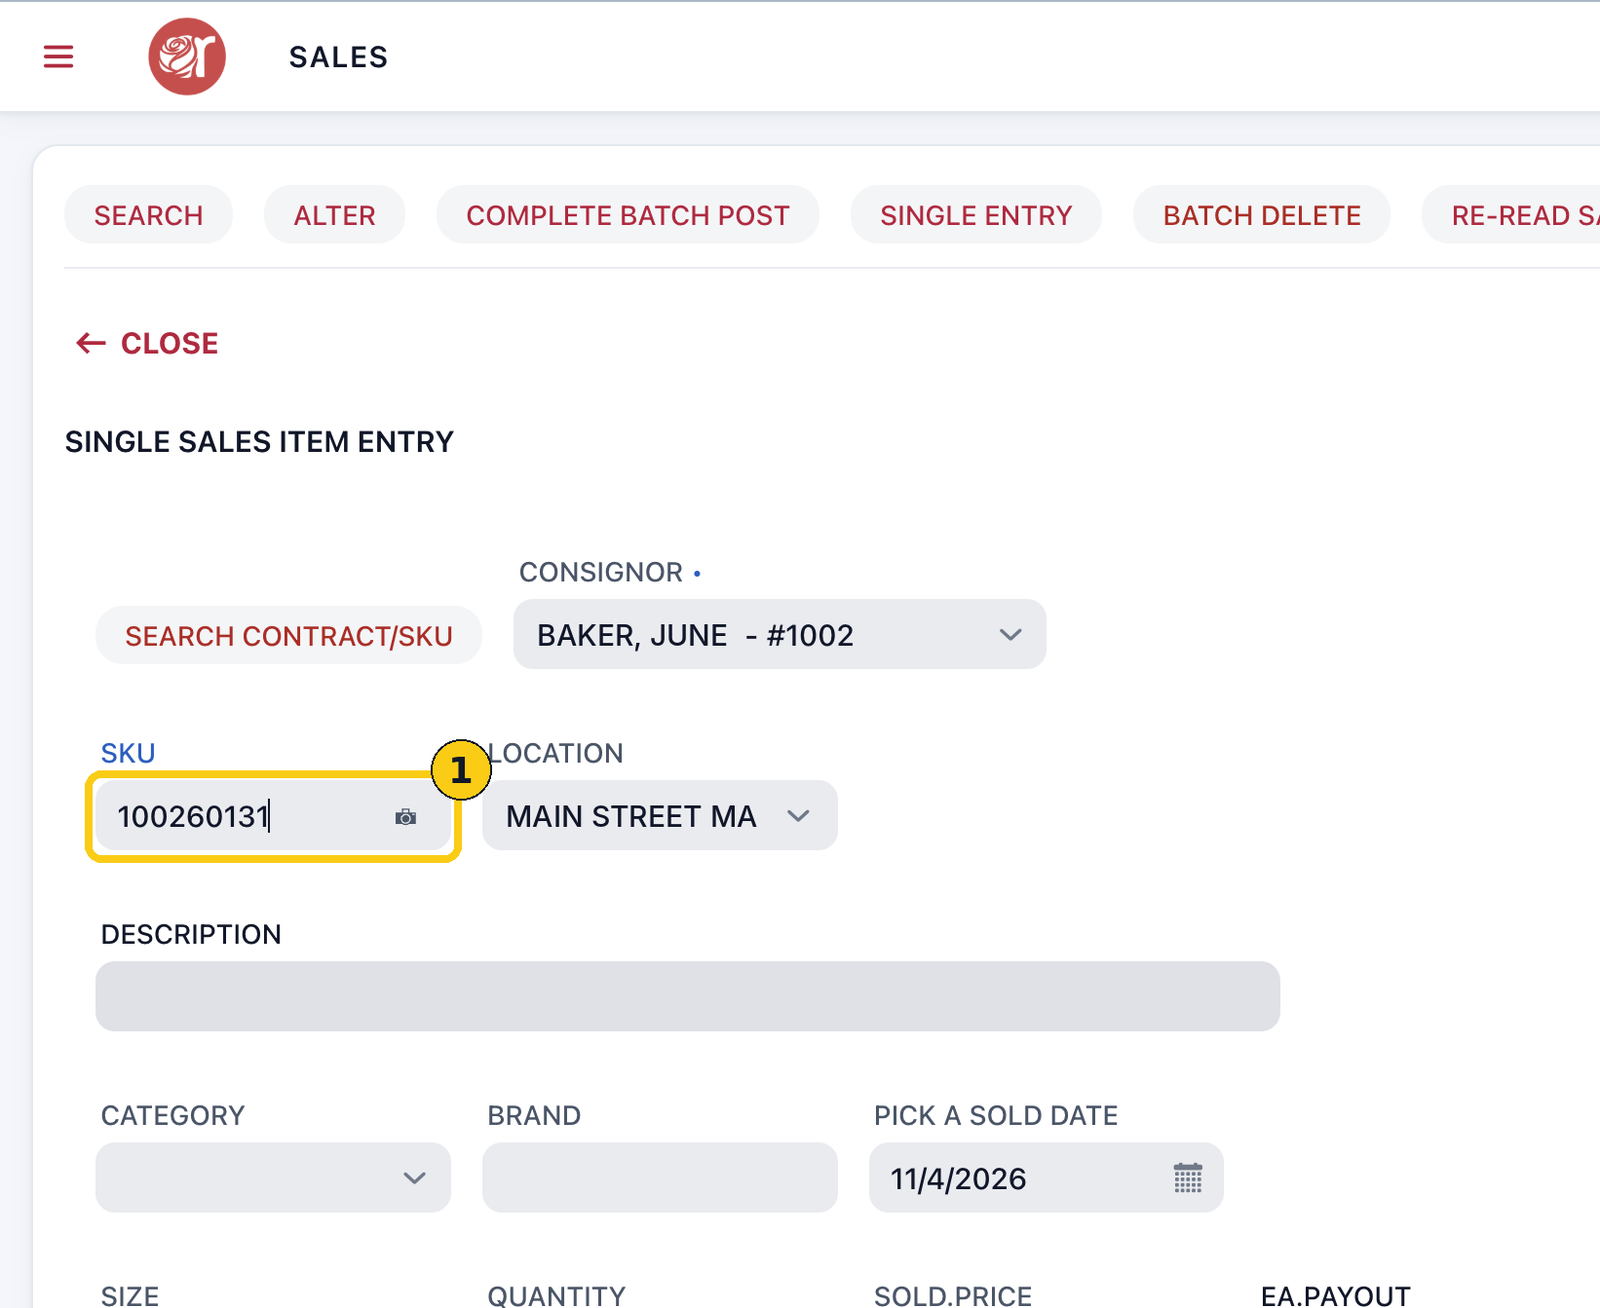
1. Type the item's SKU, or click the camera icon to scan its barcode.
2. Press Tab. Rose fills in the consignor, location, description, category, price and split from the item.
If there's no SKU
1. Click CONSIGNOR, start typing part of the consignor's or vendor's name, business or account number, and pick them from the list. The list includes vendors and your store account.
2. Enter a DESCRIPTION, pick a CATEGORY, and add a BRAND and SIZE if you want them on reports.
3. Enter the QUANTITY sold and the SOLD.PRICE for each one.
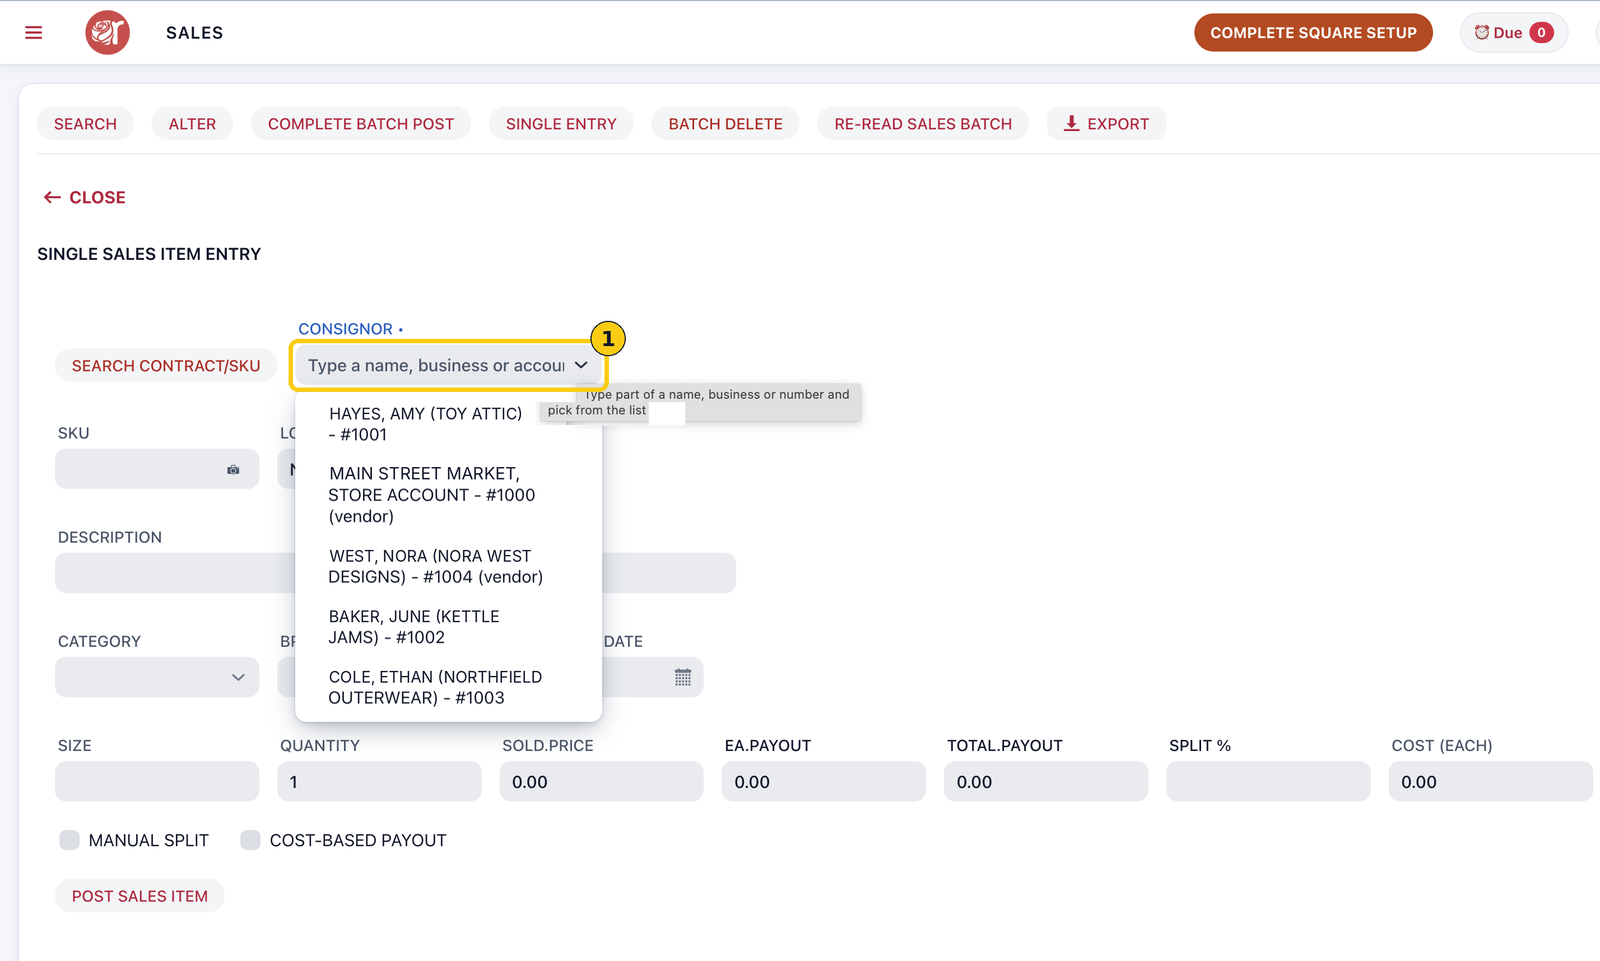
Not sure of the name or SKU? Click SEARCH CONTRACT/SKU to look up a consignor or one of their items.
Step 3: Check the details and post
1. Check the LOCATION the sale belongs to.
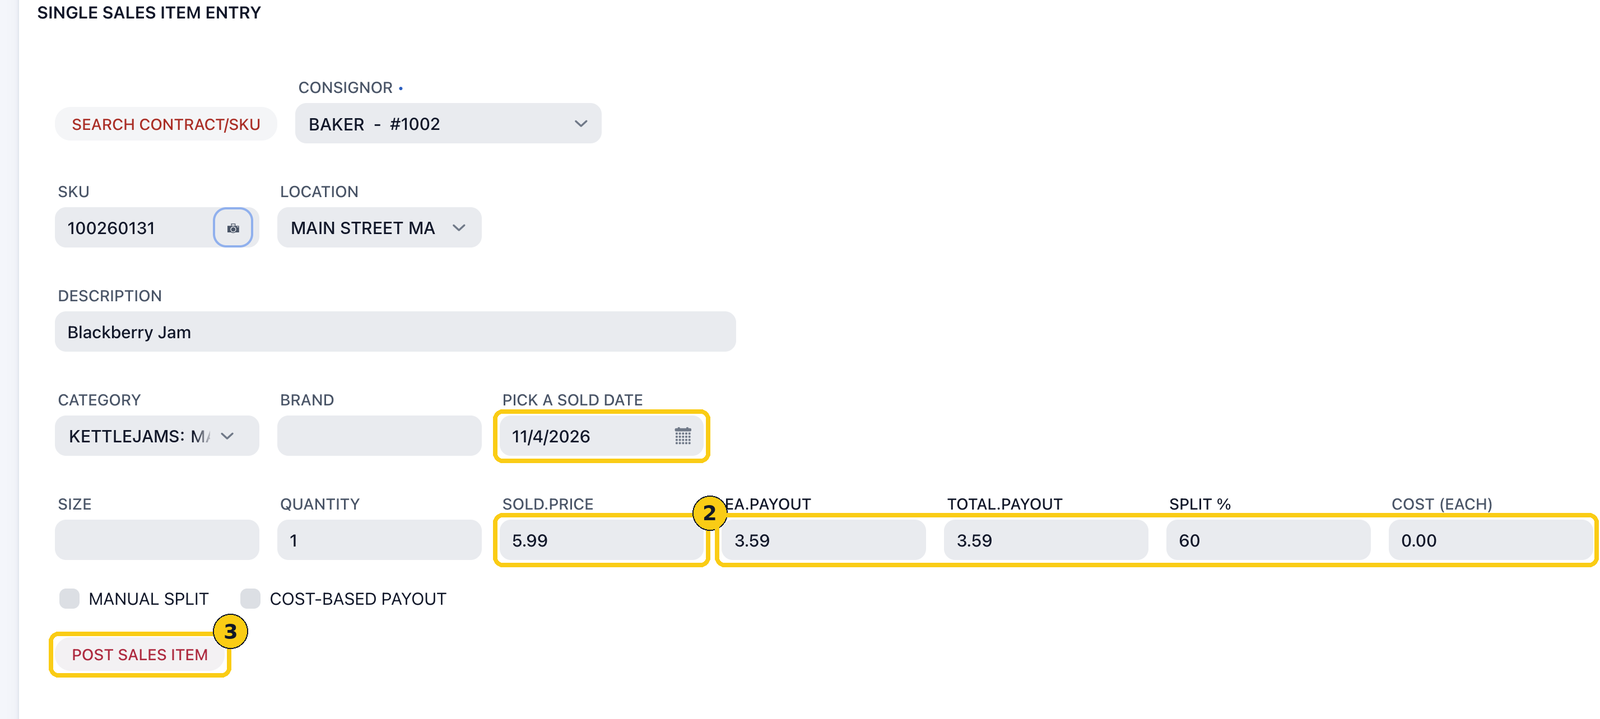
2. Check PICK A SOLD DATE. It starts on today's date; change it to the day the item actually sold.
3. After you enter the price, Rose works out the payout from the consignor's SPLIT %. Check EA.PAYOUT (per item) and TOTAL.PAYOUT before posting.
4. Click POST SALES ITEM.
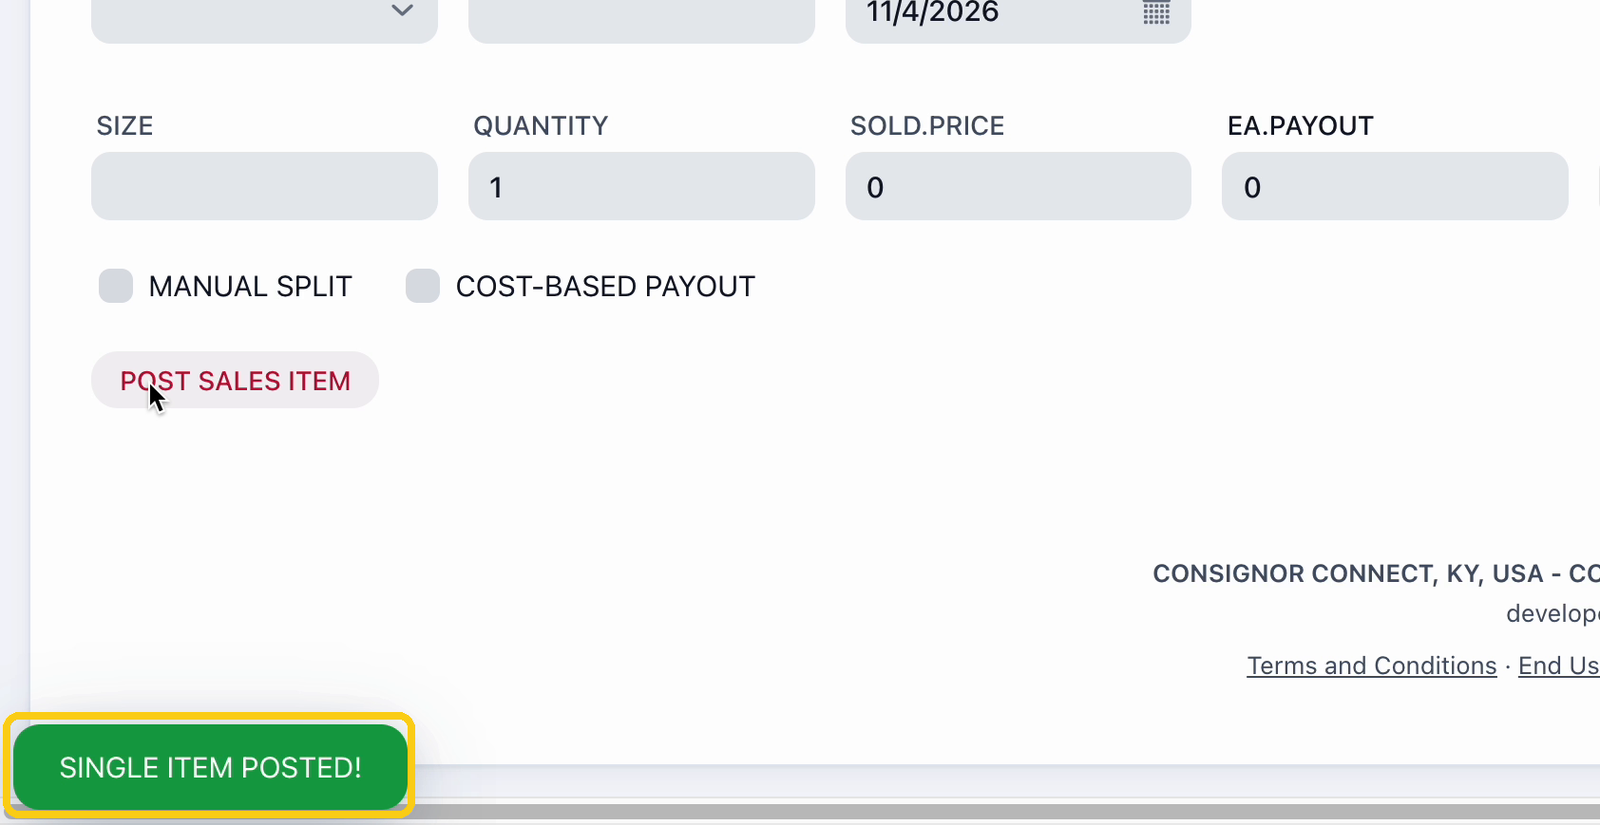
Rose shows POSTING SINGLE INVENTORY ITEM… and then SINGLE ITEM POSTED! in the bottom-left corner. The form clears, ready for the next item.
Payout fields
| Field | What it means |
|---|---|
| SPLIT % | The consignor's share, from their contract |
| EA.PAYOUT | What the consignor is paid for each item |
| TOTAL.PAYOUT | EA.PAYOUT × QUANTITY: what's added to their balance |
| COST (EACH) | The item's cost, used when COST-BASED PAYOUT is ticked |
| MANUAL SPLIT | Tick to use a different split for this sale only |
| COST-BASED PAYOUT | Tick to pay the consignor the item's cost instead of a split of the price |
FAQ
Do these sales show in Square?
No. Single Entry only records the sale in Rose and adds the payout to the consignor's account. Nothing is sent to Square.
I posted a sale to the wrong consignor. What now?
See How to fix an item posted to the wrong account in the FAQ.
Can I post several items at once?
Single Entry posts one item at a time. Enter the next item after each POST SALES ITEM.