![1512632091642-p-500.png]](https://help.consignorconnect.com/hs-fs/hubfs/1512632091642-p-500.png?width=131&height=50&name=1512632091642-p-500.png)
Still on Classic Rose? See the Classic Rose steps.
In each screenshot, the yellow boxes show what to click. Numbers give the order.
Overview
Every person who signs in to Rose needs their own user. Each user has a sign-in, the days and hours they can use Rose, a home location, and a user level (Administrator, Manager or Staff) that sets what they can see and do.
Where to find it: Dashboard › menu (☰) › User Maintenance. You need the User Maintenance right to open it.
Step 1: Open User Maintenance
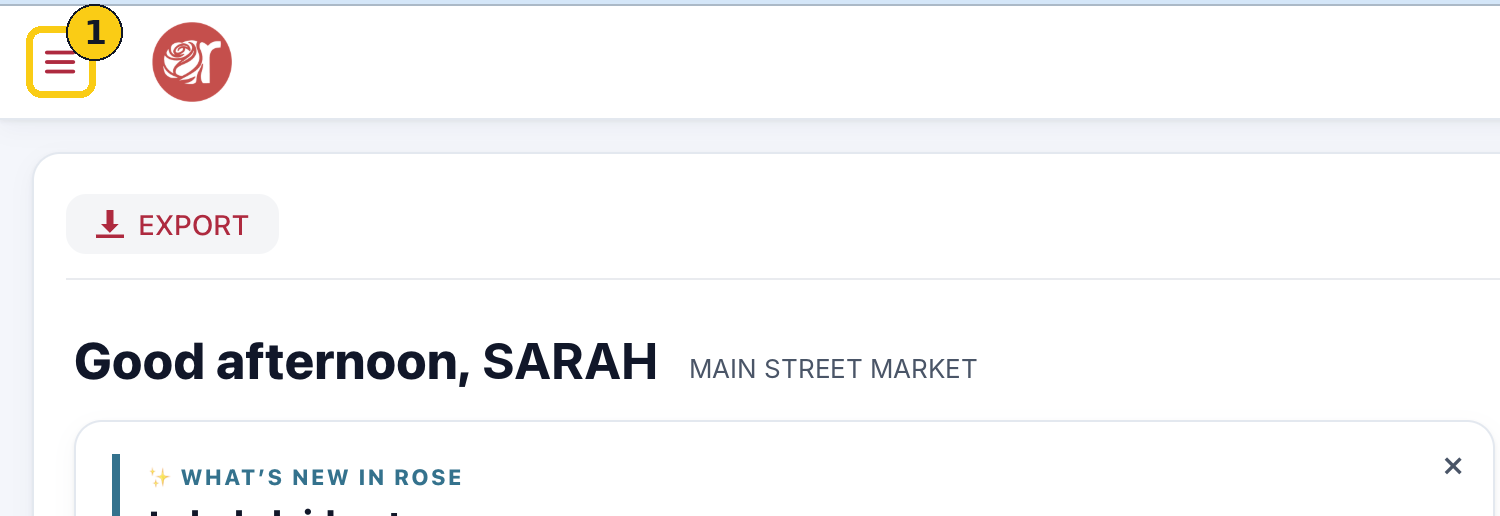
1. On your Dashboard, click the menu icon (☰) in the top-left corner.
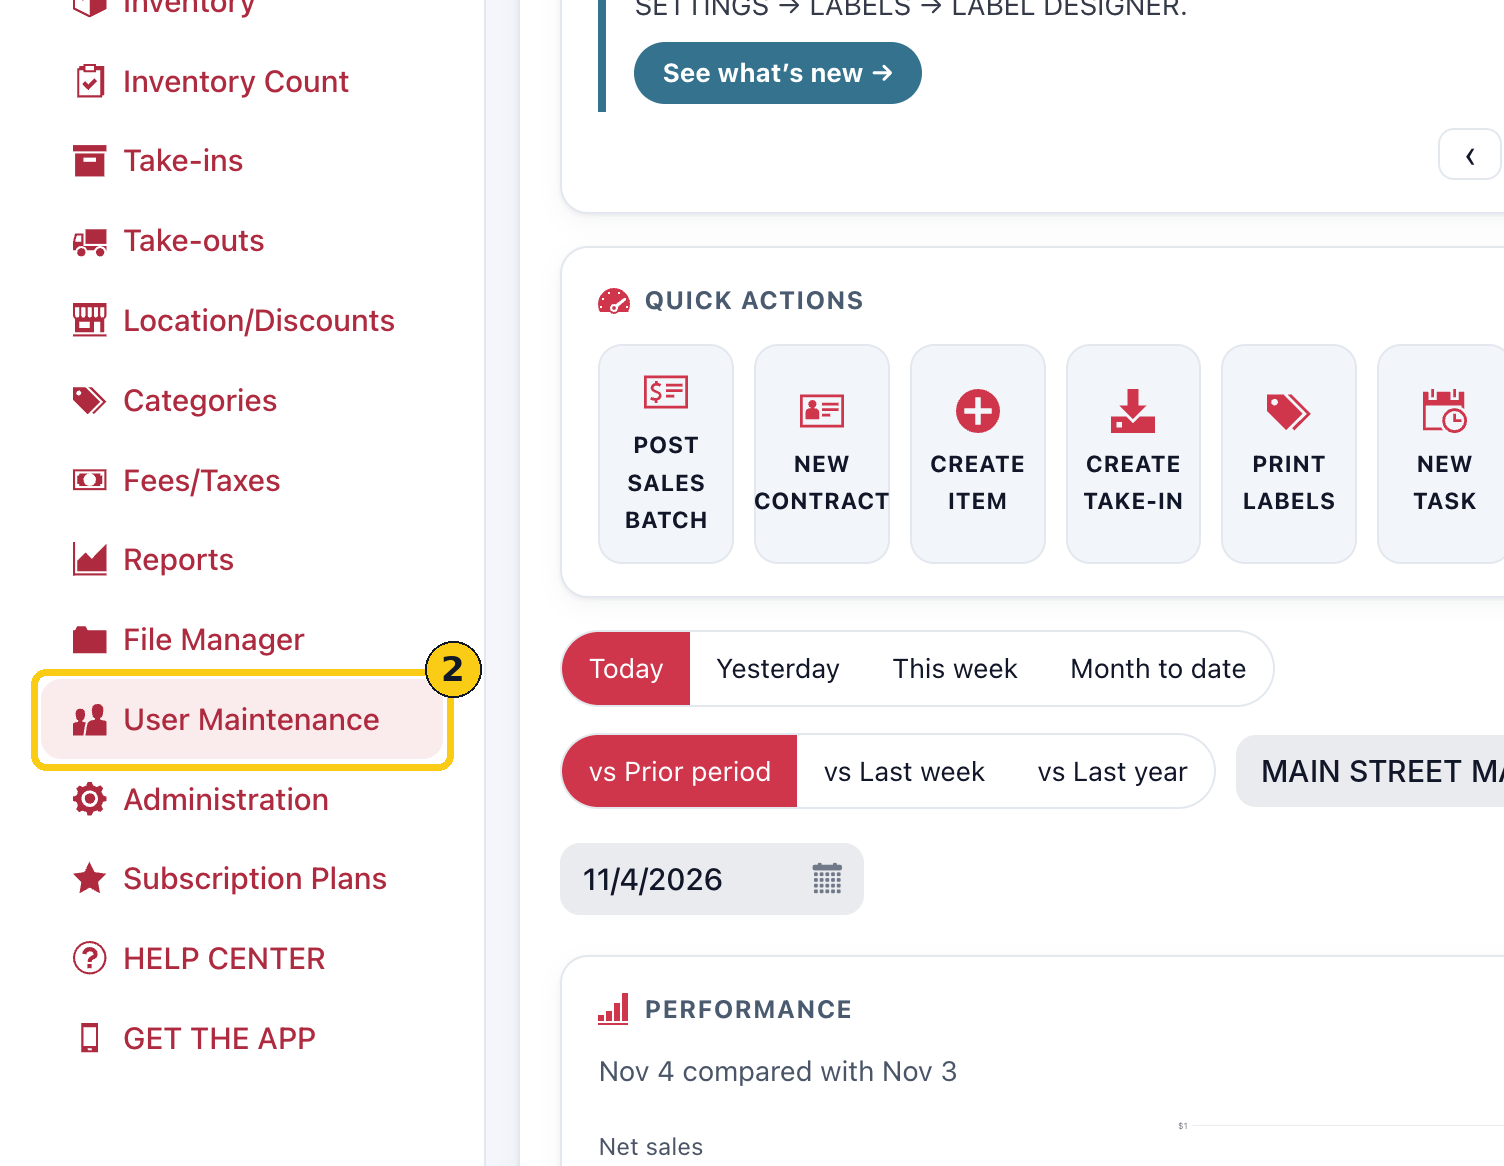
2. Click User Maintenance. The USER LIST shows everyone who can sign in, with their user name and level.
Step 2: Enter the new user's sign-in
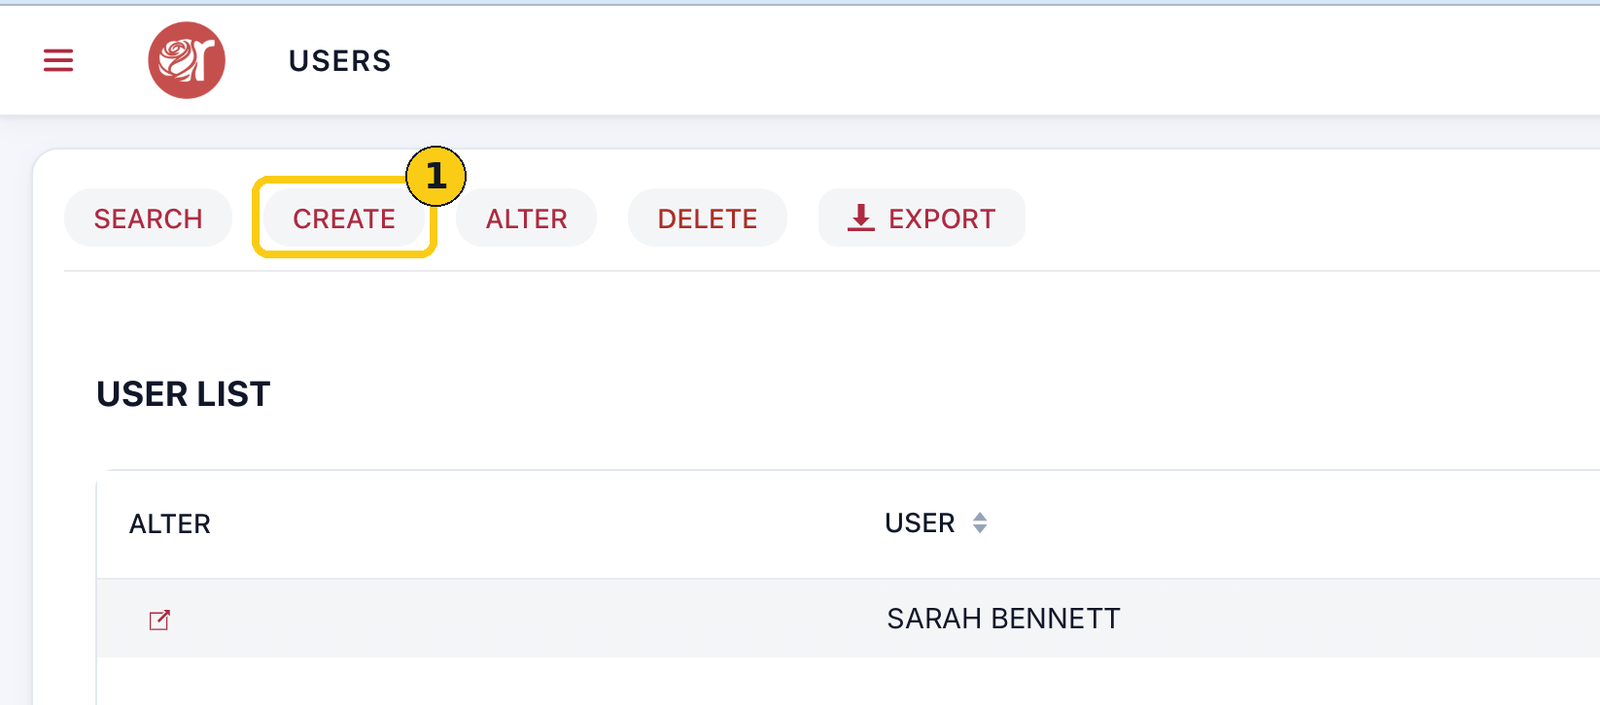
1. Click CREATE.
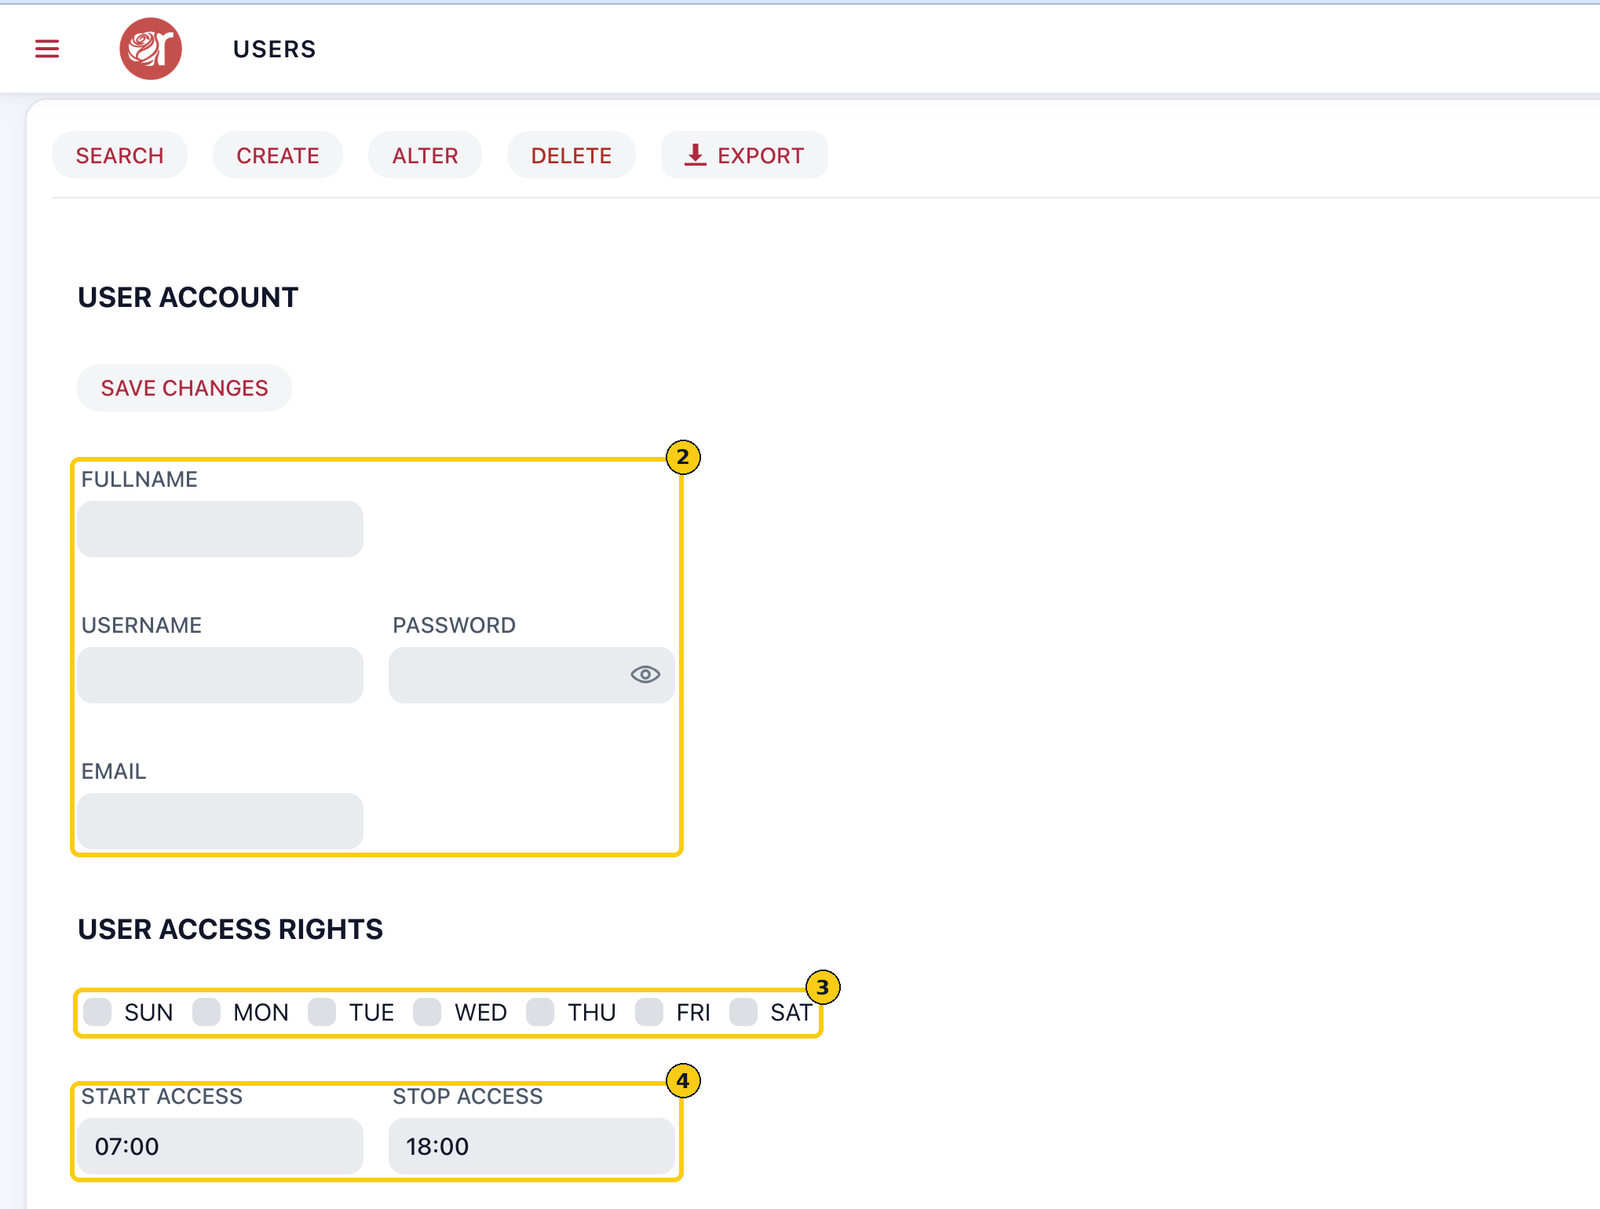
2. Under USER ACCOUNT, enter the person's FULLNAME, the USERNAME they'll sign in with, a PASSWORD and their EMAIL. Click the eye icon to check the password as you type it; there's no second box to confirm it.
Step 3: Set when they can sign in
1. Under USER ACCESS RIGHTS, tick each day of the week they're allowed to use Rose.
2. Enter START ACCESS and STOP ACCESS in 24-hour time, for example 07:00 to 18:00 for 7 am to 6 pm. Enter 00:00 in both for access at any time.
Step 4: Choose a home location
DEFAULT HOME LOCATION is where this user's new items, take-ins and take-outs start, and which location's take-in list they see. A home location set in Settings › ITEM DEFAULTS or on the consignor's contract takes priority.
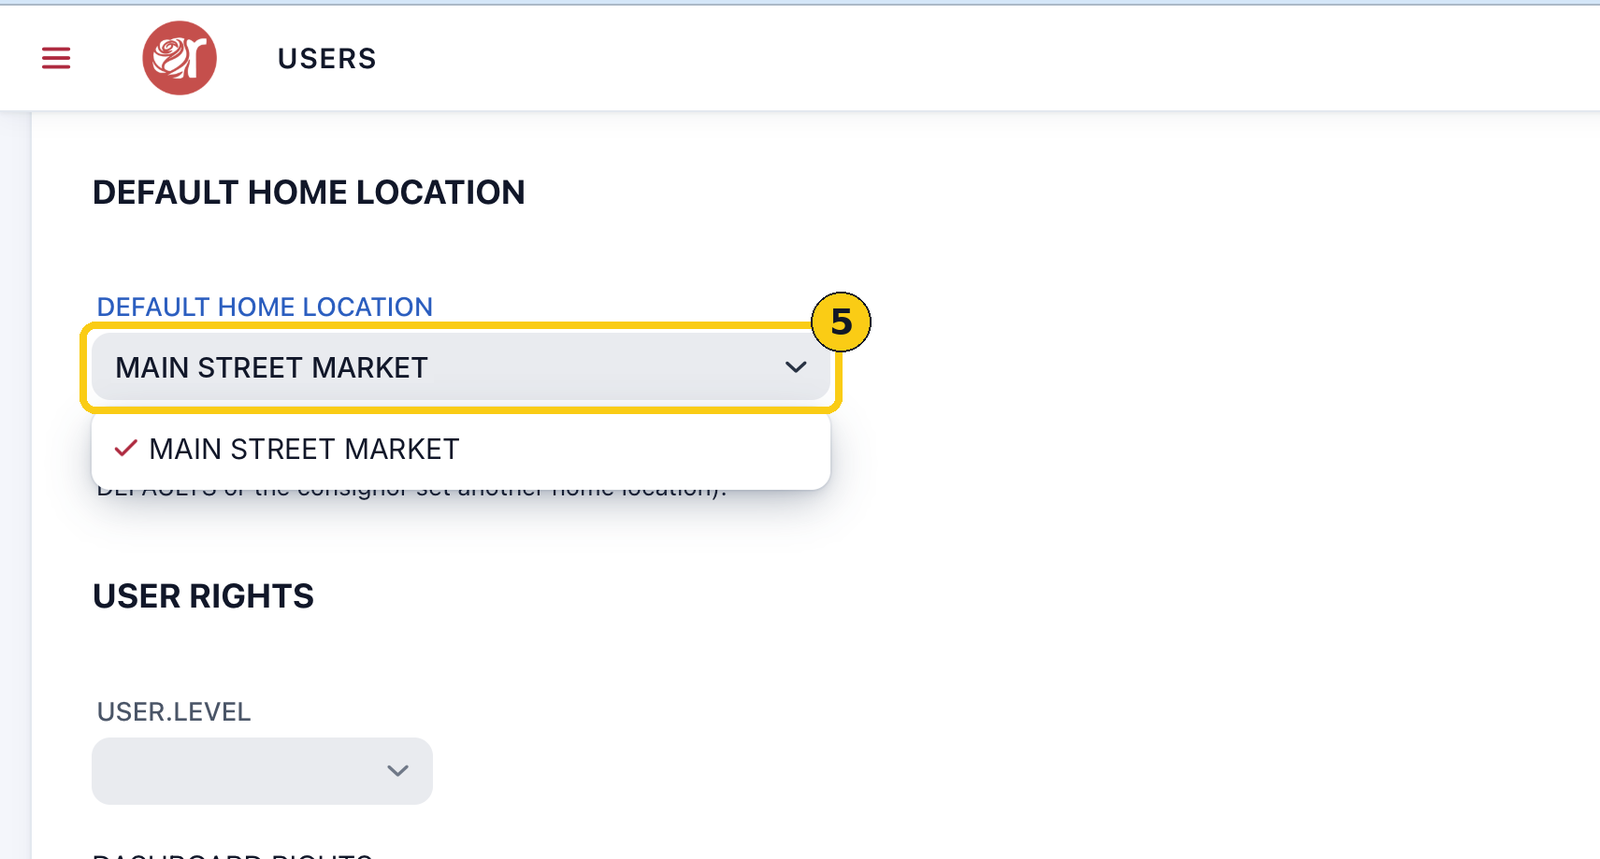
Step 5: Pick a user level
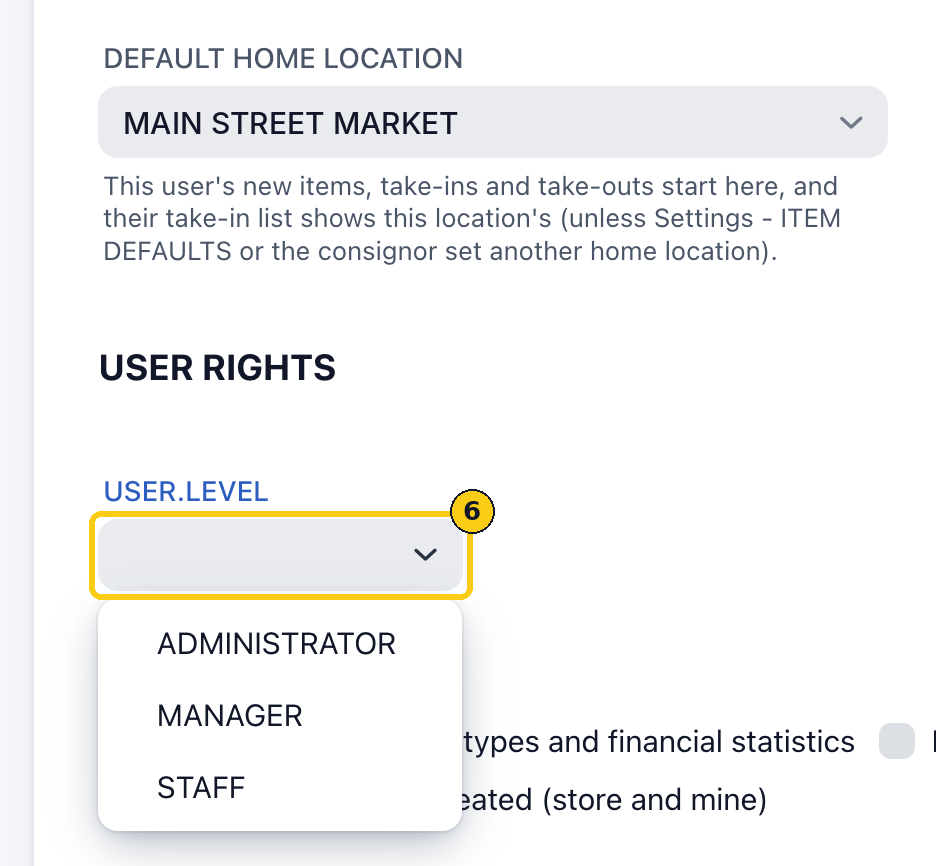
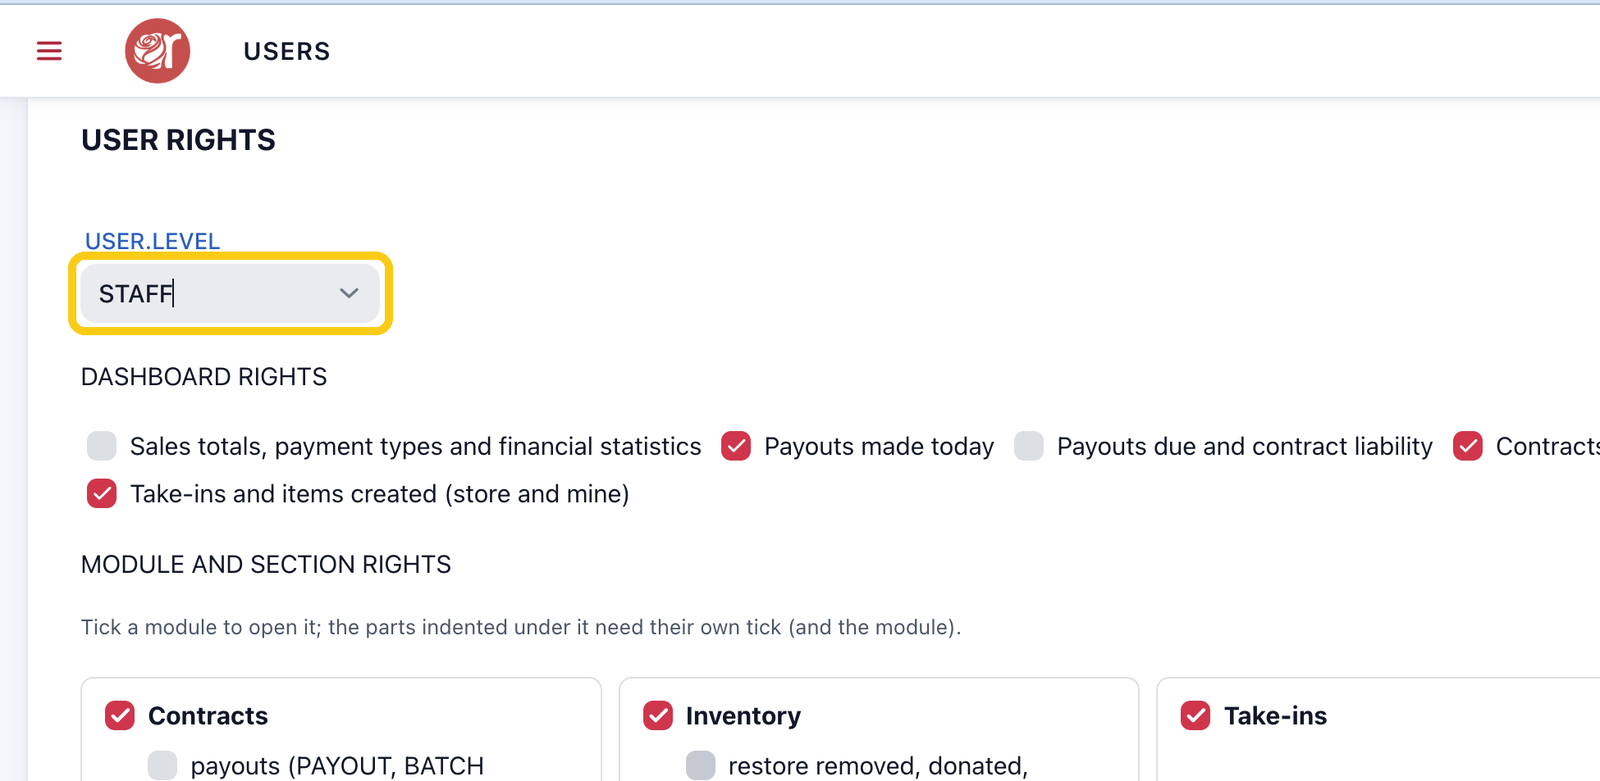
Under USER RIGHTS, open USER.LEVEL and choose ADMINISTRATOR, MANAGER or STAFF. Each level fills in its usual rights, shown below. You can then tick or untick any box to fit this person.
Starting rights by level
Dashboard rights decide which Dashboard cards the user sees.
| Dashboard card | Admin | Manager | Staff |
|---|---|---|---|
| Sales totals, payment types and financial statistics | ✓ | ✓ | – |
| Payouts made today | ✓ | ✓ | ✓ |
| Payouts due and contract liability | ✓ | ✓ | – |
| Contracts (total and new) | ✓ | ✓ | ✓ |
| Rankings: top consignors / vendors and categories | ✓ | ✓ | ✓ |
| Take-ins and items created (store and mine) | ✓ | ✓ | ✓ |
Module and section rights decide which parts of Rose the user can open. Tick a module to open it; the options indented under it need their own tick, and only work when the module is ticked.
| Module or option | Admin | Manager | Staff |
|---|---|---|---|
| Contracts | ✓ | ✓ | ✓ |
| Payouts (PAYOUT, BATCH PAYOUT) | ✓ | ✓ | – |
| Undo payouts | ✓ | ✓ | – |
| Recurring billing (BILLING) | ✓ | ✓ | – |
| Portal messages (MESSAGES inbox and pop-ups) | ✓ | ✓ | ✓ |
| Delete contracts | ✓ | – | – |
| Text messages: record START and the mobile number | ✓ | ✓ | – |
| Inventory | ✓ | ✓ | ✓ |
| Restore removed, donated, returned, lost or deleted items (TRACK ITEM - UNDO) | ✓ | – | – |
| Take-ins | ✓ | ✓ | ✓ |
| Sales | ✓ | ✓ | – |
| Single entry sales screen (SINGLE ENTRY) | ✓ | ✓ | – |
| Re-read and delete sales batches | ✓ | – | – |
| RE-READ SALES BATCH (read a day again from Square) | ✓ | – | – |
| Take-outs | ✓ | – | – |
| Transfer ownership | ✓ | – | – |
| Reports, Categories, Locations/Discounts, Fees/Taxes, User Maintenance | ✓ | – | – |
| Administration and Subscription Plans (incl. Square connection and SMS texting settings) | ✓ | – | – |
| Every screen | Admin | Manager | Staff |
|---|---|---|---|
| Export and import (Rose Pro) | ✓ | ✓ | – |
| File Manager | ✓ | ✓ | ✓ |
| Square catalog import | ✓ | – | – |
| Ask how many items a user priced (managers: staff and themselves only) | ✓ | – | – |
| Text reminders to consignors and vendors | ✓ | ✓ | ✓ |
| Text a consignor / vendor and read their texts (Rosebot chat, MESSAGES) | ✓ | ✓ | – |
| Group texts (picked people, all consignors, all vendors, everyone) | ✓ | – | – |
| Transfer expired items to store inventory | ✓ | – | – |
Step 6: Rosebot skills (Rose Pro, optional)
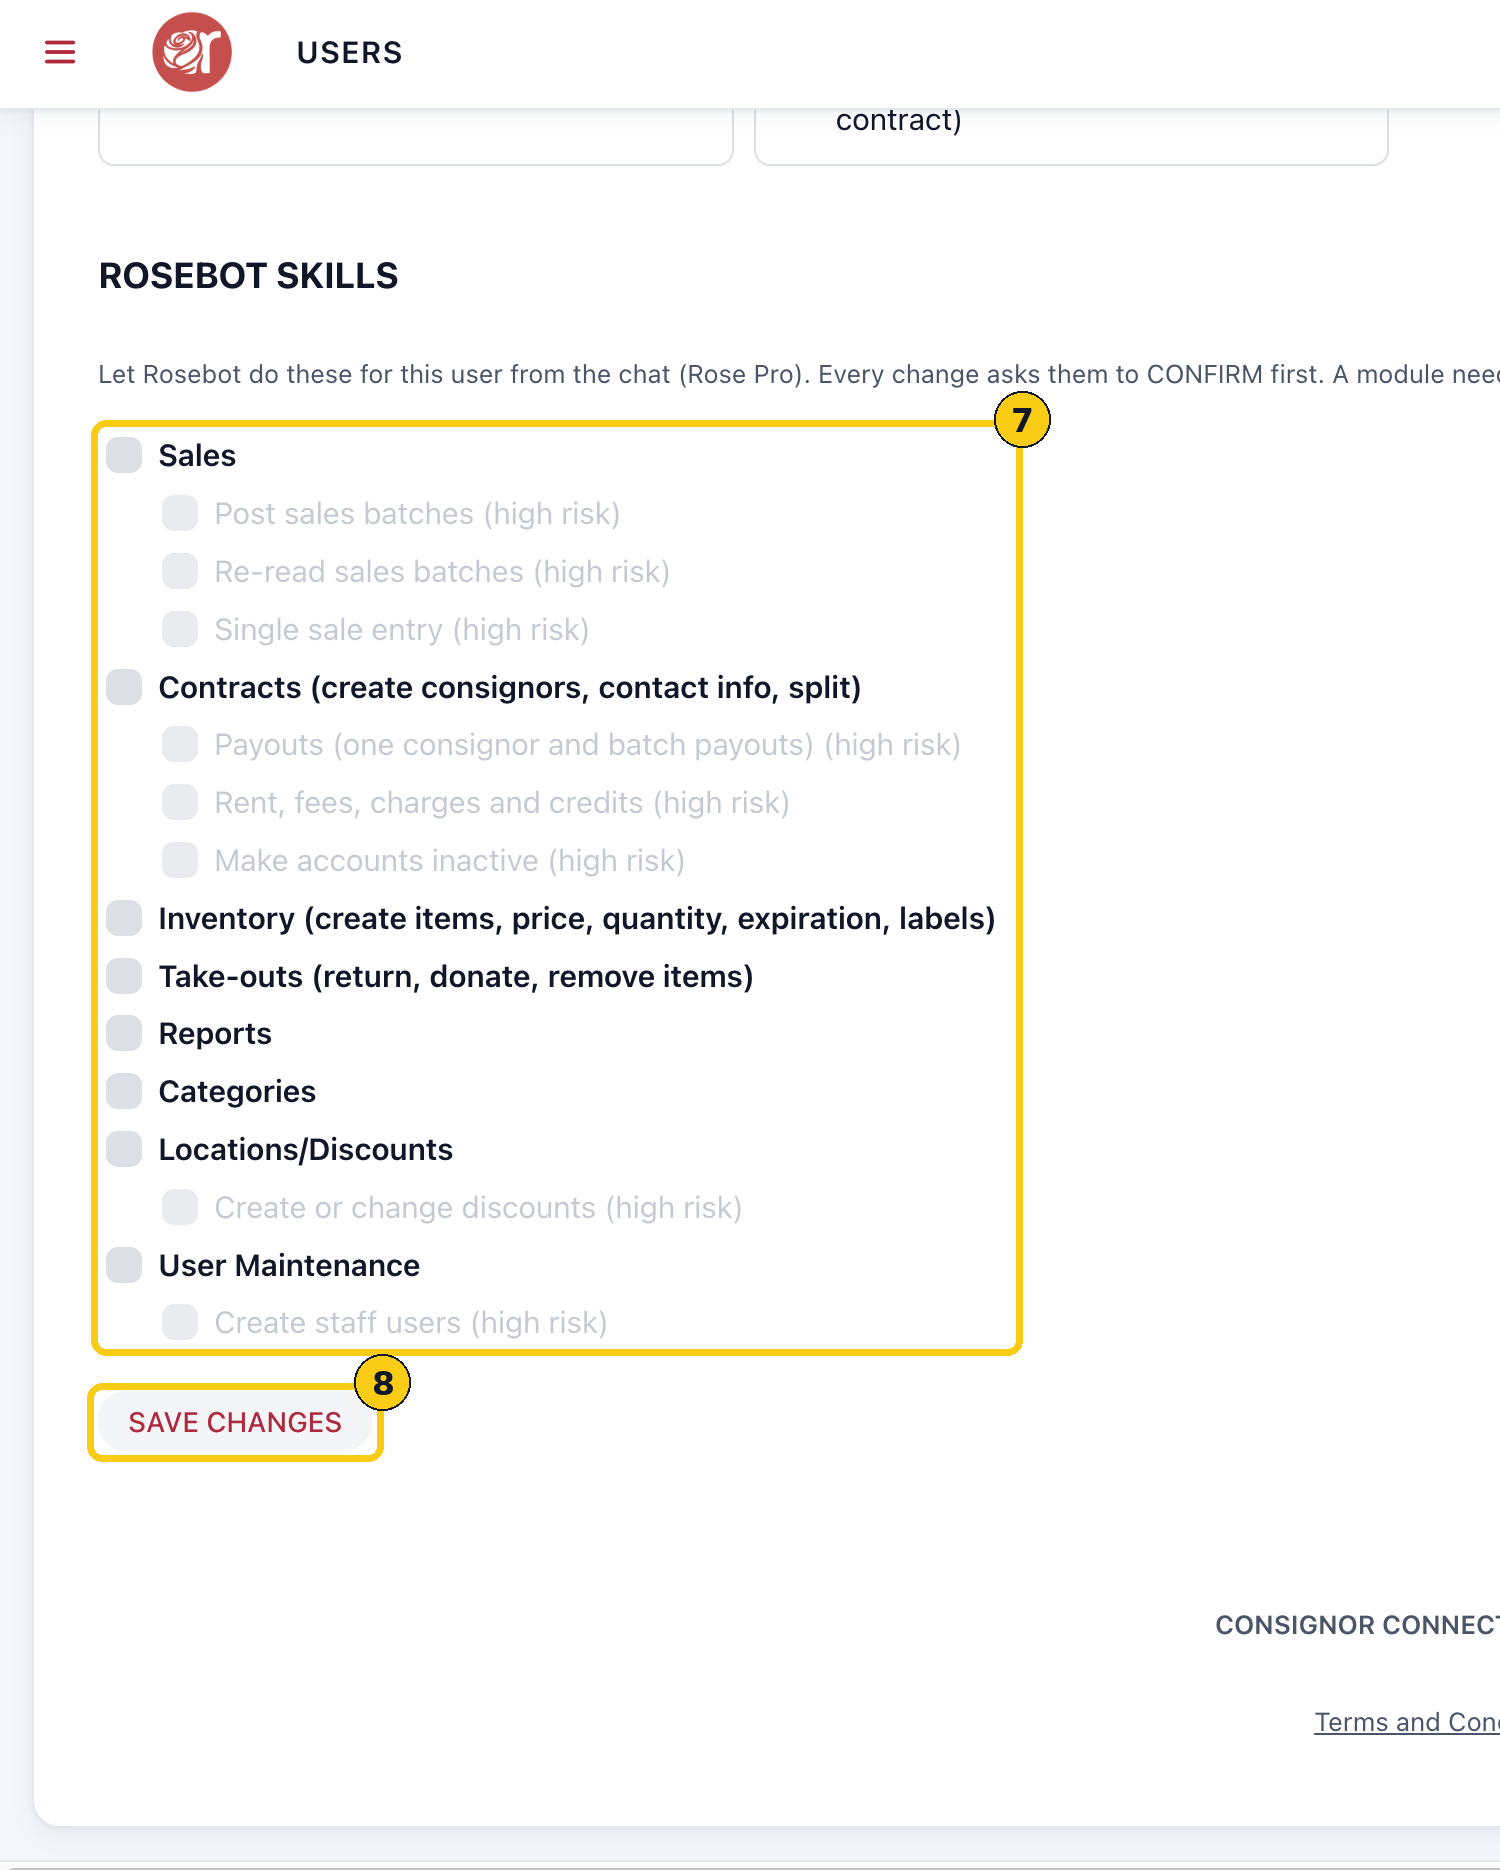
ROSEBOT SKILLS let Rosebot do tasks for this user from the chat. Every change asks the user to CONFIRM first. Each skill needs its module ticked under Module and Section Rights, and skills marked high risk need the main skill ticked too.
- Sales: post sales batches, re-read sales batches, single sale entry (all high risk)
- Contracts (create consignors, contact info, split): payouts; rent, fees, charges and credits; make accounts inactive (all high risk)
- Inventory (create items, price, quantity, expiration, labels)
- Take-outs (return, donate, remove items)
- Reports and Categories
- Locations/Discounts: create or change discounts (high risk)
- User Maintenance: create staff users (high risk)
1. Tick the skills this user should have.
2. Click SAVE CHANGES. The new user can now sign in.
Change a user or a password
1. In User Maintenance, click SEARCH to show the User List.
2. Click the user's row, or the edit icon in its ALTER column, then click ALTER.
3. Change the password, access hours, level or rights, then click SAVE CHANGES.
To remove someone who no longer works at the store, select their row and click DELETE.
FAQ
Which level should I give new staff?
Start with Staff and add only the rights the person needs. Staff can't see sales totals or payouts due, and can't pay out consignors, delete contracts or open Reports.
What does 00:00 to 00:00 mean?
The user can sign in at any time of day on the days that are ticked.
Can I change my own password?
Yes. Open User Maintenance, select your own user, click ALTER, enter the new password and click SAVE CHANGES.