![1512632091642-p-500.png]](https://help.consignorconnect.com/hs-fs/hubfs/1512632091642-p-500.png?width=131&height=50&name=1512632091642-p-500.png)

If your Account Number (profile) was created with an email address, you can reset your password to gain access.
- To login, use the password provided to you by the business owner. You can change your password in the MyAccount screen in the Portal.
If your Contract (profile) was NOT created with an email address, you will need to click the "Use old Login Page" link to direct an alternate login page.
- To login, enter your Last Name, First Name, and Password (account number).
Features of the Consignor/Vendor Portal
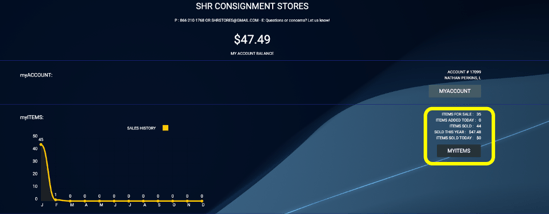
- View Balance Due and Sold Items since the last sales batch was posted.
- Visibility to selling inventory and sold but unpaid items in"MY ITEMS".
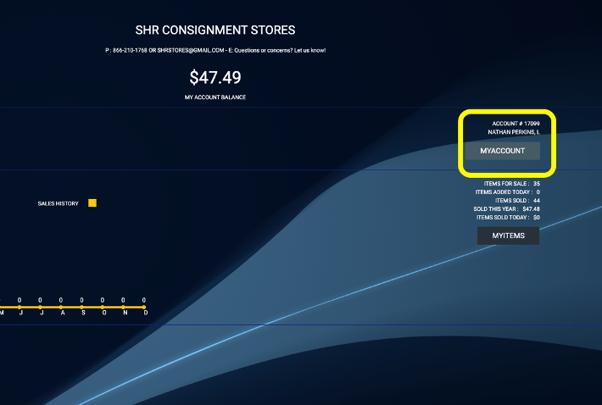
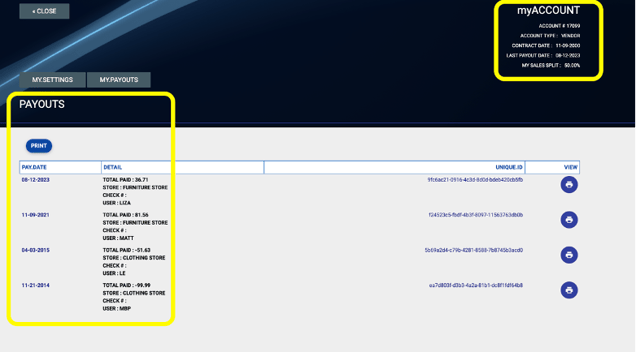
- View/print old payout receipts and change their contact info in the "MY ACCOUNT" section.
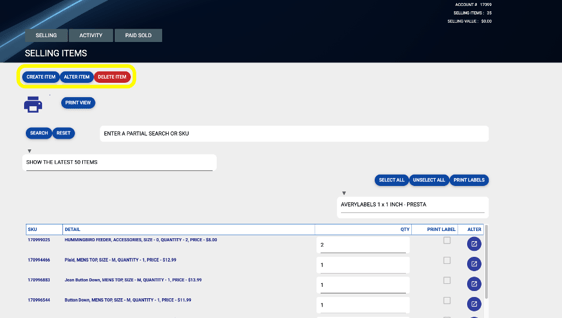
- If they are set to "Vendor" in their contract, they can edit and/or CREATE/add inventory from the Portal by clicking CREATE ITEM (See below to turn this on).
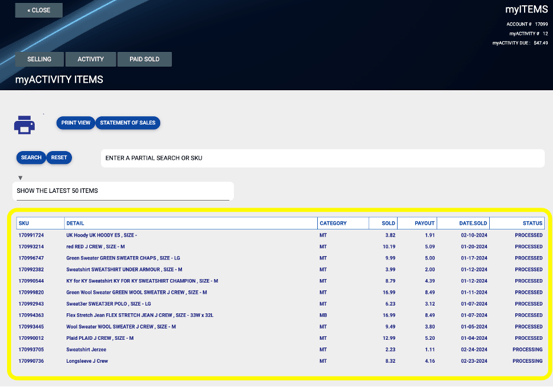
- View Inventory Sold but NOT PAID OUT by clicking on "ACTIVITY". The status field refers to inventory sales to be posted to consignor/vendor accounts
- If status = PROCESSED, then the items sold are reflected in the balance.
- If status = PROCESSING, then the sales batch has not been posted AND SOLD ITEMS are NOT reflected in the balance owed to the CONSIGNOR OR VENDOR.
- View Adjustments to the account like FEES, RENT, and PAYOUT history by selecting "MY ACCOUNT" then "MY PAYOUTS”.
- [FOR STORE OWNERS/MANAGERS ONLY]
If you'd like consignors/vendors to be able to add/edit inventory, you can turn that on by making them a vendor in the Contract screen of main Rose.- Open their contract by clicking the "ALTER" button.
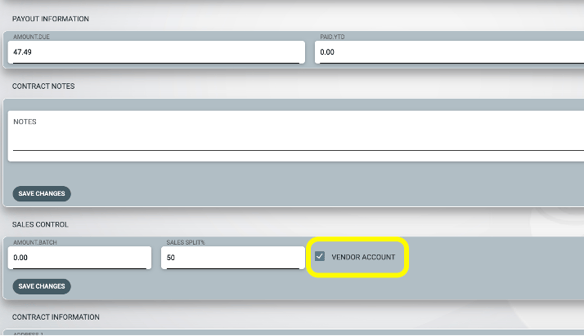
- Click on "MAKE CHANGES" and then scroll to where you see "sales split %" in the "SALES CONTROL" field.
- Next to that field is a check box labeled "VENDOR ACCOUNT". Check that box and click "SAVE CHANGES".
- [FOR STORE OWNERS/MANAGERS ONLY]
This will allow them to add and edit inventory in the portal.
Only do this if your vendors need to be able to edit and add inventory. You may need to help them print labels.
Label Printing Requirements:
Chrome browser via PC or Mac
Avery Presta 94103 Square label (1 in. x 1 in.)
Margins must be set to "None"
Scaling set to Custom "100"
Paper size should be set to "Letter".
View the video below to learn how to navigate and use the Consignor/Vendor Portal: